
eVolve Mechanical is a software and service company committed to the construction industry. But you probably already knew that.
There’s a lot about eVolve Mechanical that you probably already know about. You probably know that it helps improve profitability and visibility for trade contractors by aligning teams on a single platform. Or that eVolve Mechanical offers the fastest and easiest configuration for your company.
But there are a few things about eVolve that you may not know, and these things can help you take full advantage of all eVolve has to offer.
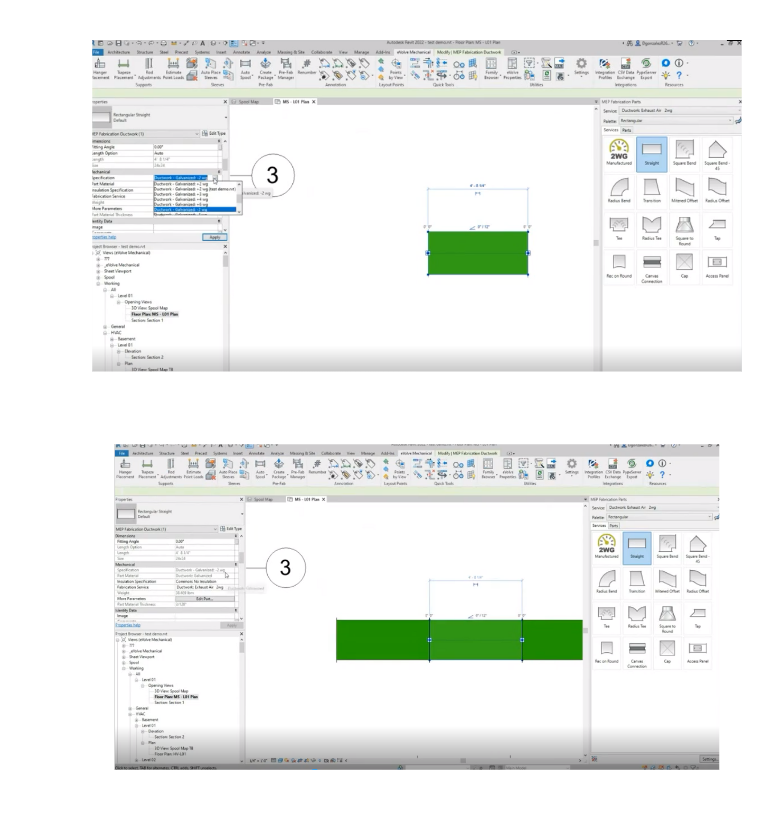
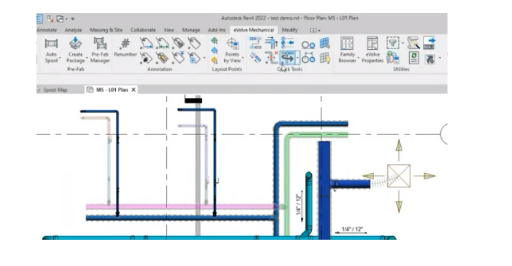
Let’s say your client needs a service color on their title block. To manually type in information, start by adding an MEP Fabrication piece down. For this example, a green Exhaust Air was used.
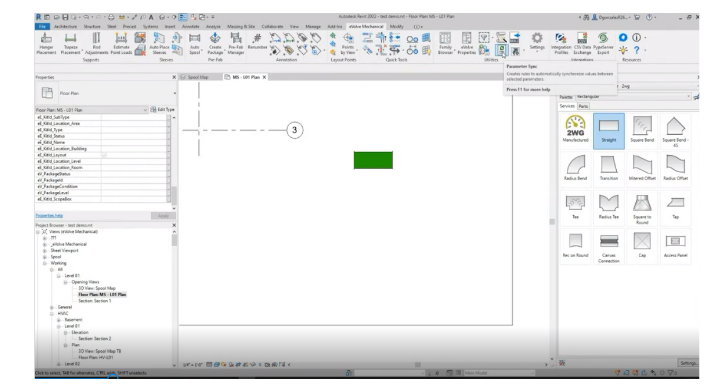
From there, go to the MEP Fabrication Ductwork section to the left, and scroll down to find the TEST SHARED PARAMETER. After you’ve done this, you can set up Parameter Sync rules by clicking on Parameter Sync at the top of the page.
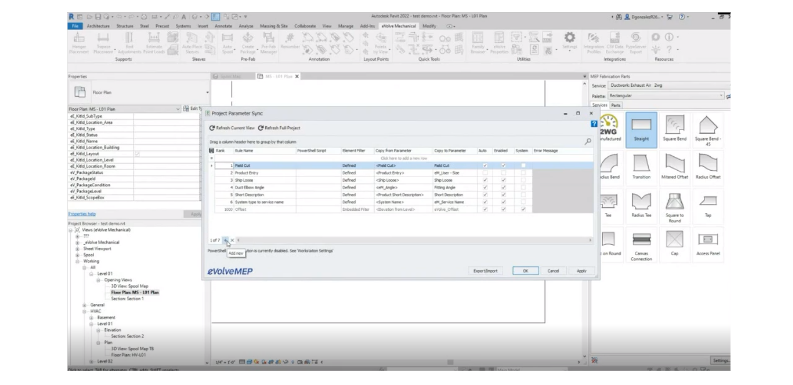
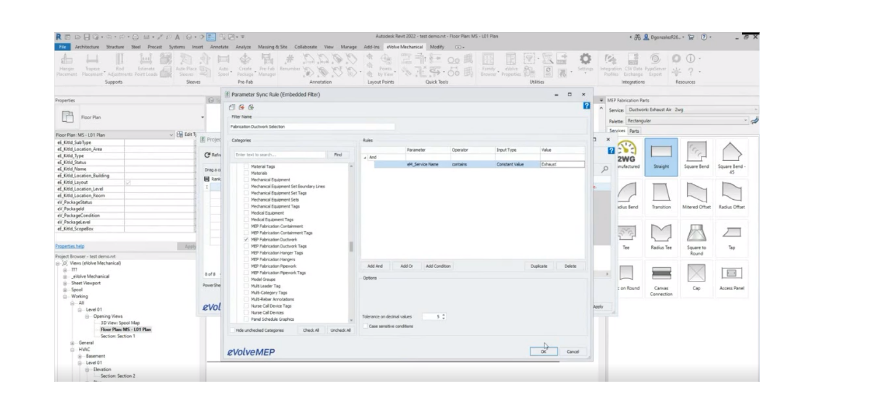
Once the Parameter Sync option comes up, you can either add a new row to the existing rows by clicking the + sign at the bottom, or by clicking the box right under the Rule Name section. For this example, we named the new rule Service Color. From there, you can use the Element Filter to make your selection.
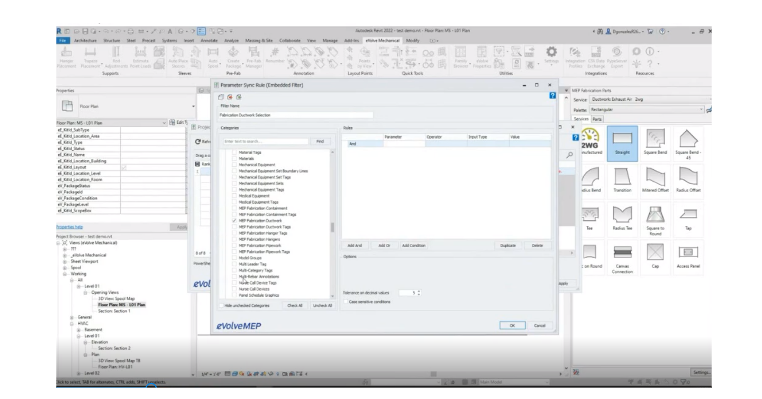
When you click on the drop down arrow beside the Element Filter, another box should open up. This is where you will type in the Filter Name and scroll down to MEP Fabrication Ductwork. After this, you will add a condition by clicking on the Add Condition tab.
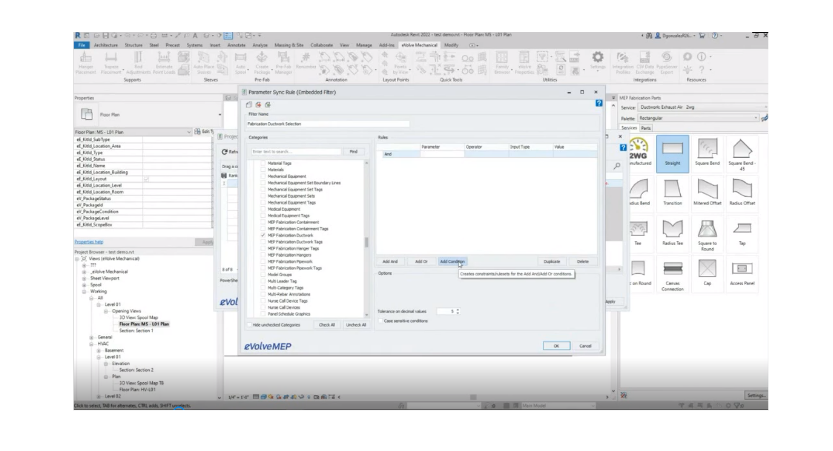
Once you click Add Condition, a section will come up where you will plug in the service name under the Parameters option. For this example, we plugged in eM_Service Name. Under Operator you can choose “contains.” Under Input Type, you will choose “constant value,” and under “value,” you will type in “exhaust.”
Once you click “OK,” it will take you back to the Project Parameter Sync, where you will type in the exhaust name under the Copy From Parameter atb. For this example, because the Exhaust Air was green, we titled it as “Green.” Then select the Copy to Parameter, and scroll down until you find the TEST SHARED PARAMETER. Make sure to Auto and Enable it before clicking Apply and OK.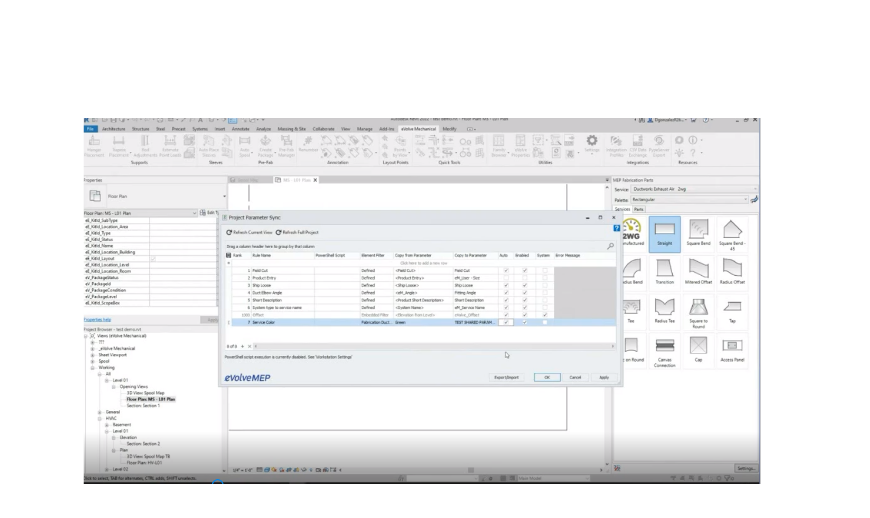
Be aware that whenever you click the “Apply” and “Okay,” if you select the green Exhaust Air, and scroll back down, the area next to the TEST SHARED PARAMETER will still be blank. But once you select the Exhaust Air and drop down a new one, the area next to the TEST SHARED PARAMETER will be labeled as green.
In order to get the first green exhaust air to also be labeled as green, you can go back to the Project Parameter Sync box, and choose either Refresh Current View, or Refresh Full Project.
If you didn’t know about the Parameter Sync, this tool is a great way to find more functionality in eVolve.
Another thing you may not know about eVolve is that you can use the Parameter Sync to change the fabrication service from one to another. To do this, start off by using the Native Revit Change Service.
Select more than one piece; then go up to the Modify MEP Fabrication Pipework tab, and you’ll see a Change Service option. Select this option; then select which service you want to change it to. Then click “OK.”
It’s important to remember that you have to select more than one piece for this to be successful.
In addition, if you want to change the spec of an individual piece, you have the ability to click the drop don in the MEP Fabrication Ductwork section; however, when you start to add a third item that puts the original piece in between the new added pieces, that original piece will be grayed out.
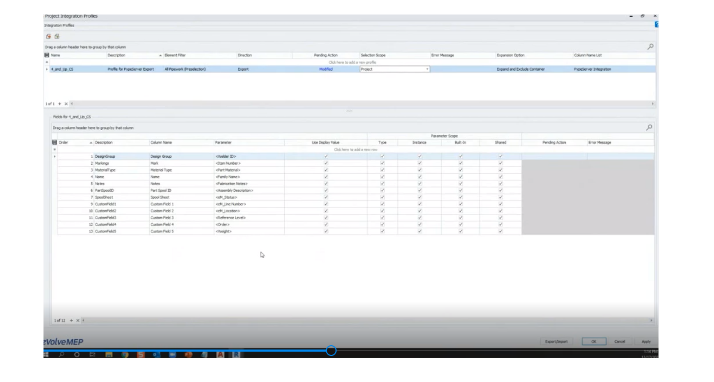
To utilize the PypeServer Export, click on the Integrations Profile. Once this comes up, you can start creating the export from here. To do this, you will make up a profile using the Element Filter.
Click on the drop down button beside the All Pipework option, and search for anything that is MEP Fabrication Pipework. The part material should be carbon steel; we also want to export anything that is 4 inches and up. Once you have that set up, click OK.
Whenever you’re making Integration Profiles, you need to fill out both the Element Filter and the Selection Scope. Using the Selection Scope, you can choose to export by your view, your project, or your selection. For this example, we chose a project.
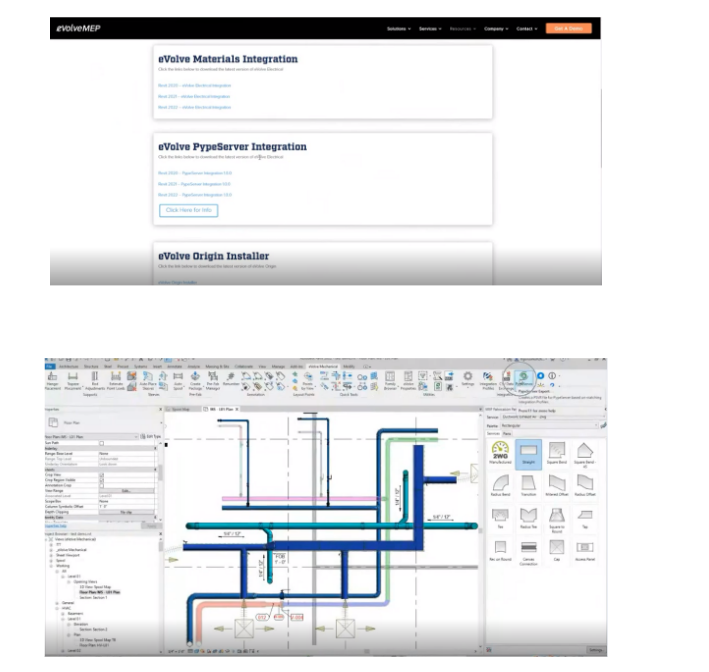
This is a basic export for PypeServer. Once you set this up and click OK, you can download it from our website by going to the Downloads page. From there, scroll down to eVolve PypeServer Integrations to install it.
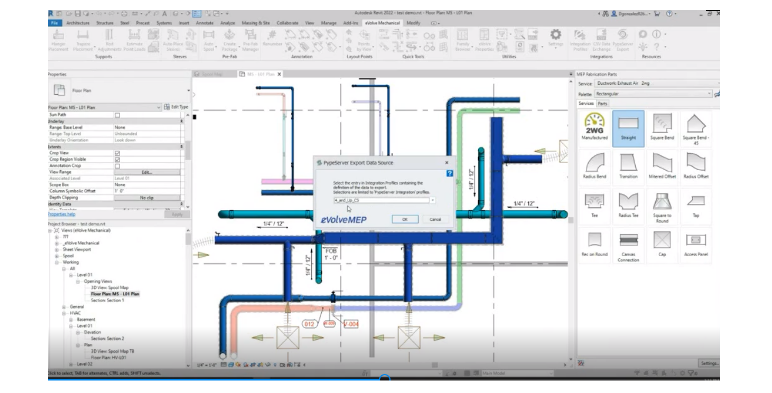
 If you need to use this exporter, after you set up the profile, click on PypeServer Export. When it asks for the profile you want to use, click the dropdown and select the profile you created. Once you click OK, you can save it to your desktop.
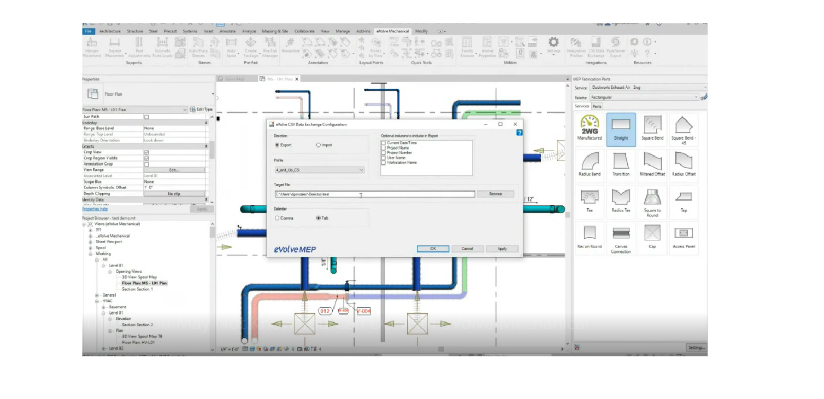
Since you have it created as a profile, you can also use the CSV Data Exchange option, and export that. To this, you can add columns, and import it back in, if needed.
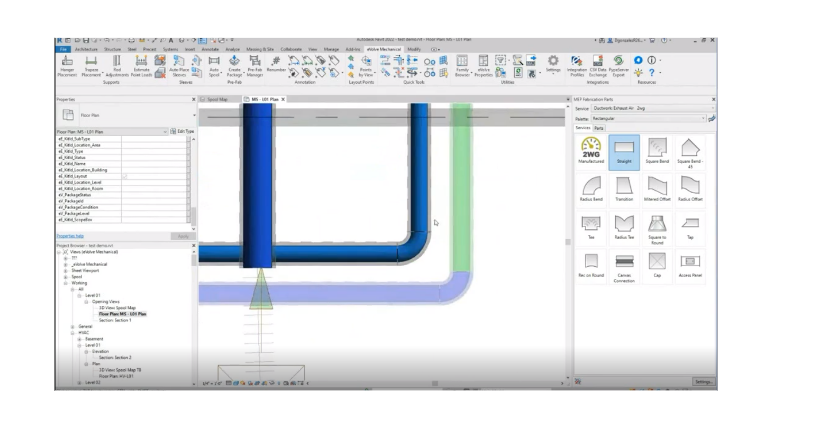
For example, looking at a Spool Map, if you need to rotate a piece, you can rotate it clockwise. But when you hold Shift and click, it will go counterclockwise. Just be aware that the buttons have different functionalities when you hold the Shift button.
Also, you no longer need to use the Edit Assembly tool when you need to edit. Instead, you can go to Auto Spool and click on Modify Spool and move around the individual parts. If you need to merge multiple spools into one, click on Modify Spool, press Shift, and select the parts you want to combine.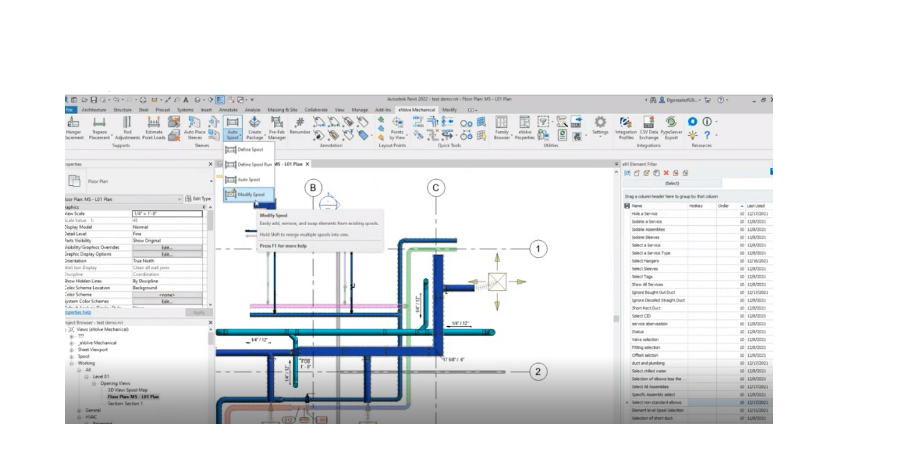
Another tool that you will find useful is the “Ignore Bought Out Duct” option. If you want to quickly export the duct, go to the eM Element Filter section and click on “Ignore Bought Out Duct.” This makes the whole selection for you, as needed.
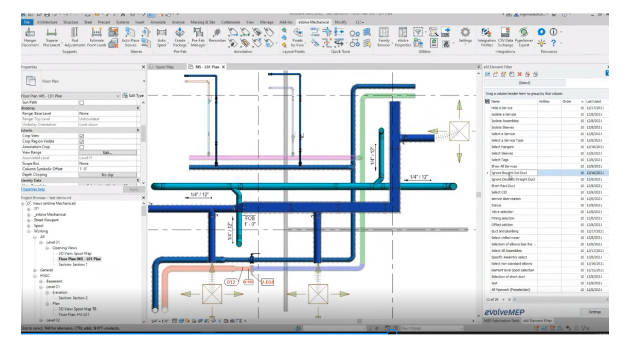
If you only want to export a small section of it, with a preselected area, you can double-click on “Ignore Bought Out Duct.” This is a useful tool if you want to export a smaller section, rather than the entire view.
Hopefully, you’ve learned about new tools and features within eVolve that you can take full advantage of.
Connect with eVolve Mechanical on social media to receive special offers and stay up to date on new innovations.
There’s a lot about eVolve Mechanical that you probably already know about. You probably know that it helps improve profitability and visibility for trade contractors by aligning teams on a single platform. Or that eVolve Mechanical offers the fastest and easiest configuration for your company.
But there are a few things about eVolve that you may not know, and these things can help you take full advantage of all eVolve has to offer.
- Parameter Sync
Let’s say your client needs a service color on their title block. To manually type in information, start by adding an MEP Fabrication piece down. For this example, a green Exhaust Air was used.
From there, go to the MEP Fabrication Ductwork section to the left, and scroll down to find the TEST SHARED PARAMETER. After you’ve done this, you can set up Parameter Sync rules by clicking on Parameter Sync at the top of the page.
Once the Parameter Sync option comes up, you can either add a new row to the existing rows by clicking the + sign at the bottom, or by clicking the box right under the Rule Name section. For this example, we named the new rule Service Color. From there, you can use the Element Filter to make your selection.
When you click on the drop down arrow beside the Element Filter, another box should open up. This is where you will type in the Filter Name and scroll down to MEP Fabrication Ductwork. After this, you will add a condition by clicking on the Add Condition tab.
Once you click Add Condition, a section will come up where you will plug in the service name under the Parameters option. For this example, we plugged in eM_Service Name. Under Operator you can choose “contains.” Under Input Type, you will choose “constant value,” and under “value,” you will type in “exhaust.”
Once you click “OK,” it will take you back to the Project Parameter Sync, where you will type in the exhaust name under the Copy From Parameter atb. For this example, because the Exhaust Air was green, we titled it as “Green.” Then select the Copy to Parameter, and scroll down until you find the TEST SHARED PARAMETER. Make sure to Auto and Enable it before clicking Apply and OK.
Be aware that whenever you click the “Apply” and “Okay,” if you select the green Exhaust Air, and scroll back down, the area next to the TEST SHARED PARAMETER will still be blank. But once you select the Exhaust Air and drop down a new one, the area next to the TEST SHARED PARAMETER will be labeled as green.
In order to get the first green exhaust air to also be labeled as green, you can go back to the Project Parameter Sync box, and choose either Refresh Current View, or Refresh Full Project.
If you didn’t know about the Parameter Sync, this tool is a great way to find more functionality in eVolve.
Another thing you may not know about eVolve is that you can use the Parameter Sync to change the fabrication service from one to another. To do this, start off by using the Native Revit Change Service.
Select more than one piece; then go up to the Modify MEP Fabrication Pipework tab, and you’ll see a Change Service option. Select this option; then select which service you want to change it to. Then click “OK.”
It’s important to remember that you have to select more than one piece for this to be successful.
In addition, if you want to change the spec of an individual piece, you have the ability to click the drop don in the MEP Fabrication Ductwork section; however, when you start to add a third item that puts the original piece in between the new added pieces, that original piece will be grayed out.
- PypeServer Export
- PypeServer Export
To utilize the PypeServer Export, click on the Integrations Profile. Once this comes up, you can start creating the export from here. To do this, you will make up a profile using the Element Filter.
Click on the drop down button beside the All Pipework option, and search for anything that is MEP Fabrication Pipework. The part material should be carbon steel; we also want to export anything that is 4 inches and up. Once you have that set up, click OK.
Whenever you’re making Integration Profiles, you need to fill out both the Element Filter and the Selection Scope. Using the Selection Scope, you can choose to export by your view, your project, or your selection. For this example, we chose a project.
This is a basic export for PypeServer. Once you set this up and click OK, you can download it from our website by going to the Downloads page. From there, scroll down to eVolve PypeServer Integrations to install it.
If you need to use this exporter, after you set up the profile, click on PypeServer Export. When it asks for the profile you want to use, click the dropdown and select the profile you created. Once you click OK, you can save it to your desktop.
Since you have it created as a profile, you can also use the CSV Data Exchange option, and export that. To this, you can add columns, and import it back in, if needed.
- Functions of Asterisks
For example, looking at a Spool Map, if you need to rotate a piece, you can rotate it clockwise. But when you hold Shift and click, it will go counterclockwise. Just be aware that the buttons have different functionalities when you hold the Shift button.
Also, you no longer need to use the Edit Assembly tool when you need to edit. Instead, you can go to Auto Spool and click on Modify Spool and move around the individual parts. If you need to merge multiple spools into one, click on Modify Spool, press Shift, and select the parts you want to combine.
Another tool that you will find useful is the “Ignore Bought Out Duct” option. If you want to quickly export the duct, go to the eM Element Filter section and click on “Ignore Bought Out Duct.” This makes the whole selection for you, as needed.
If you only want to export a small section of it, with a preselected area, you can double-click on “Ignore Bought Out Duct.” This is a useful tool if you want to export a smaller section, rather than the entire view.
Hopefully, you’ve learned about new tools and features within eVolve that you can take full advantage of.
Connect with eVolve Mechanical on social media to receive special offers and stay up to date on new innovations.


")